- Overview
- Installing Theme and Plugins
- Demo Content Installation
- Getting Started
- Theme Options
- Sidebars / Widgets
- Setting the slider
- Setting the pages
- Setting the Blog
- Setting the Portfolio
- Setting the Team Members
- Setting the Testimonials
- Setting the Client's Logo
- One-page site
- Visual Composer
- Setting WPML Multi-Lanuage
- Translation
- Shortcodes
- FAQ
- Sources / Credits
Setting the Portfolio
Setting the Portfolio
The Portfolio section is core part of our Zenista theme. You can setup it very easily. The process is like this:
- Create some portfolio items
- Show them on page (in row/column or with carousel effect)
1. Creating some Portfolio items
- To setup Portfolio, first you need to add some entries(items) with photos and texts. Go to "Portfolio" section and click "Add New". Fill details as described in below screenshot:
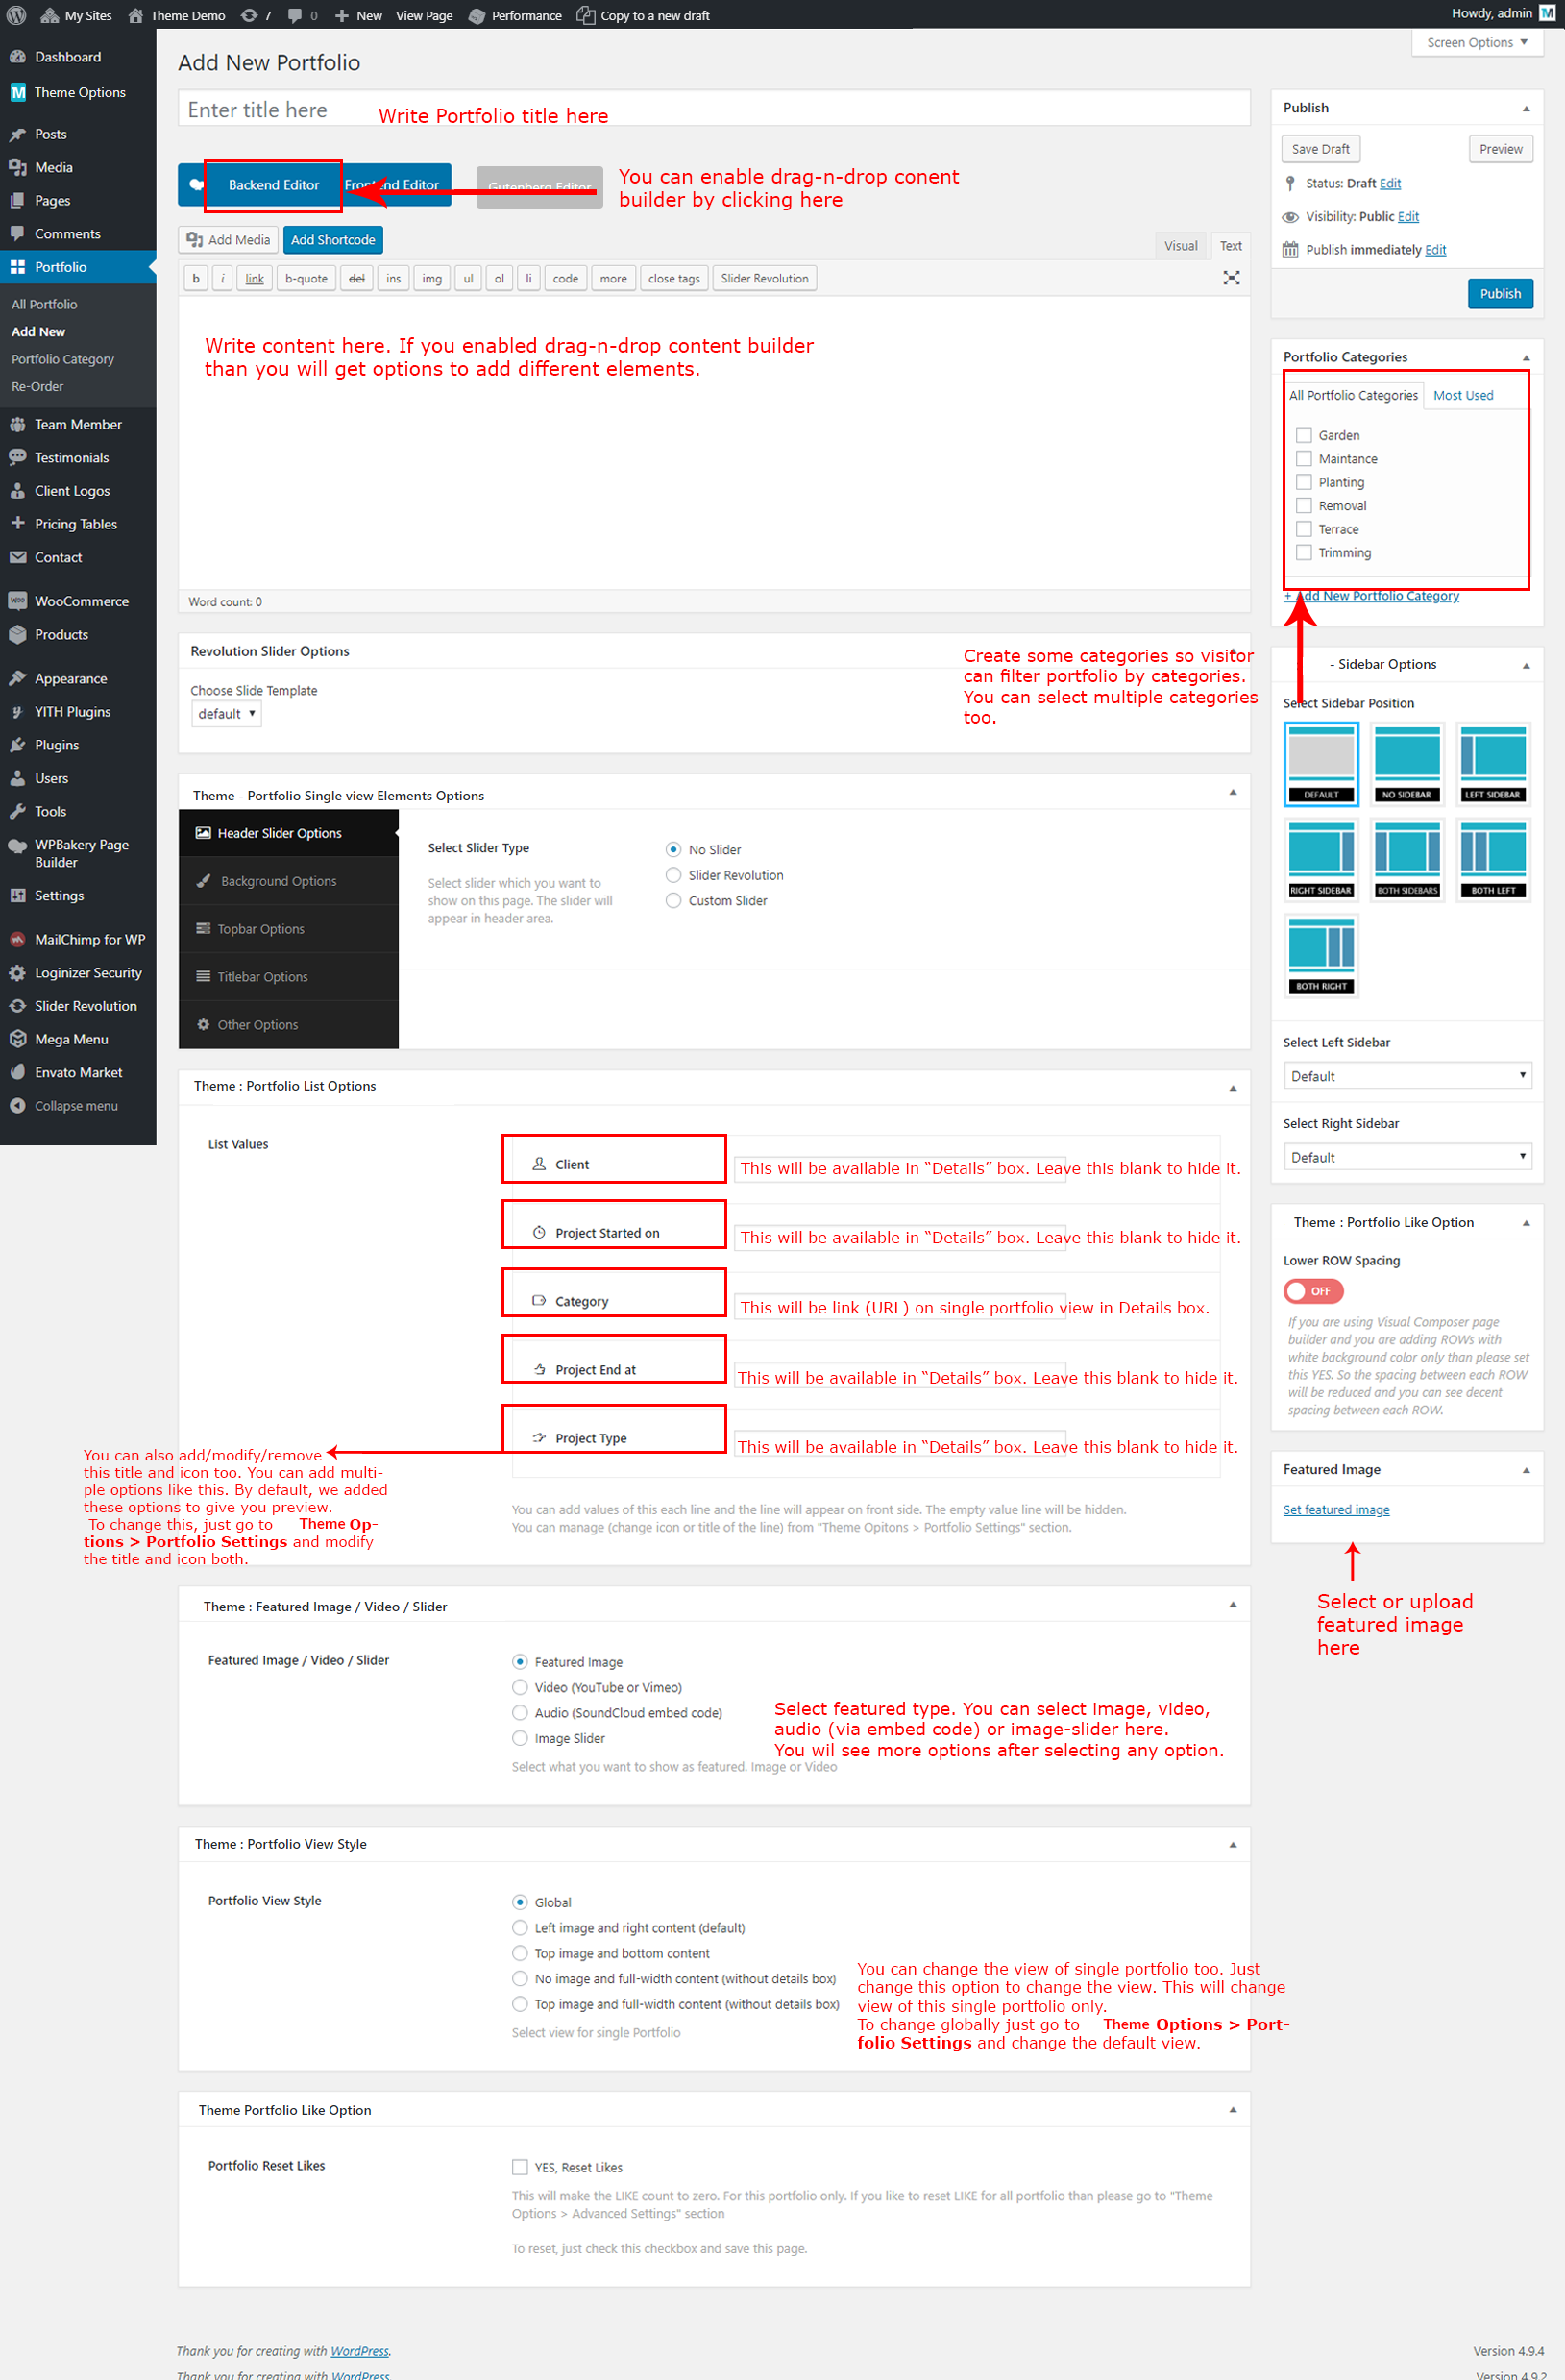
- Create some more entries as described above.
2. Show them on page (in row/column or with carousel effect)
- Now we need to create a page to show all portfolio entries. So create a new page now and fill title and also enable the Visual Composer editor:

- Now click on Add Element button to add Portfolio element:
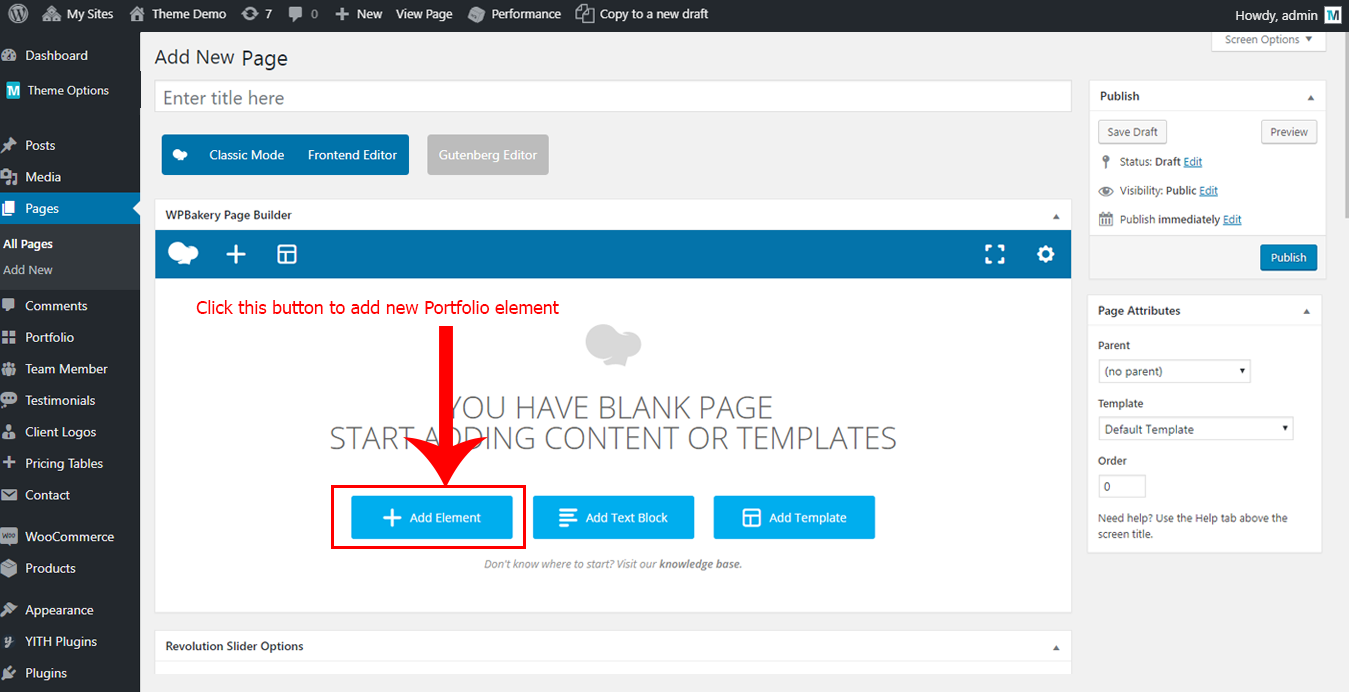
- Now click on the ThemetechMount Portfolio Box button to add portfolio lists:
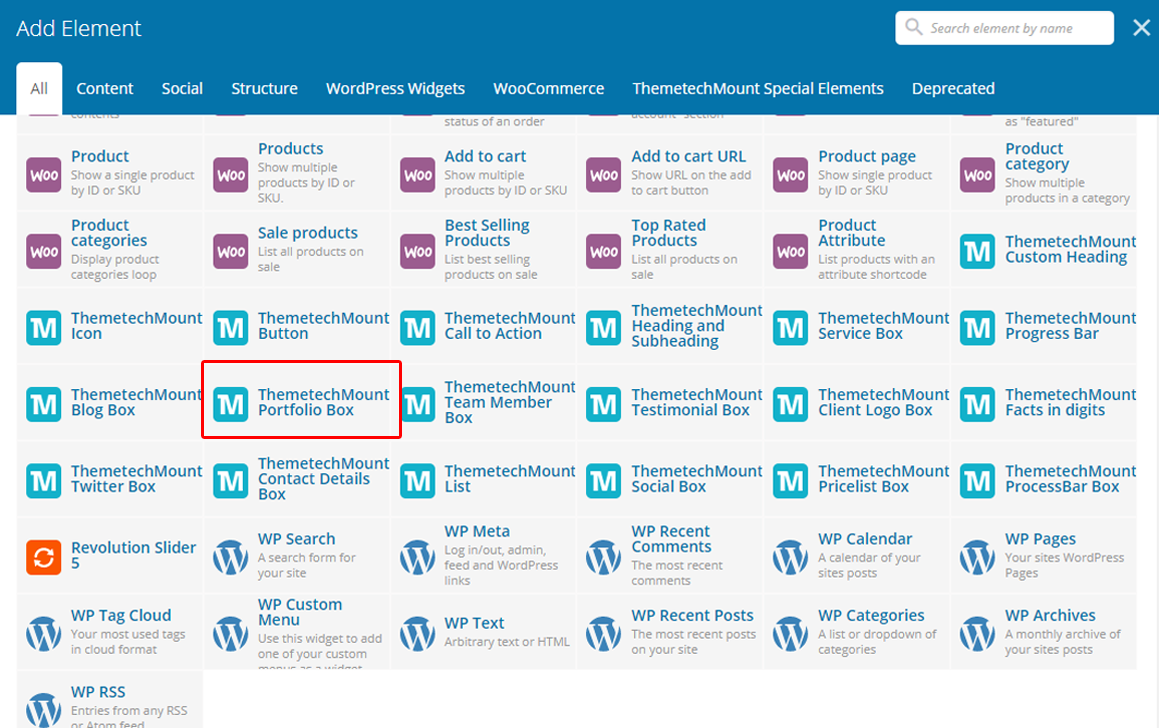
- Now you will see ThemetechMount Portfolio Box Settings box. Just set as in below screenshot:
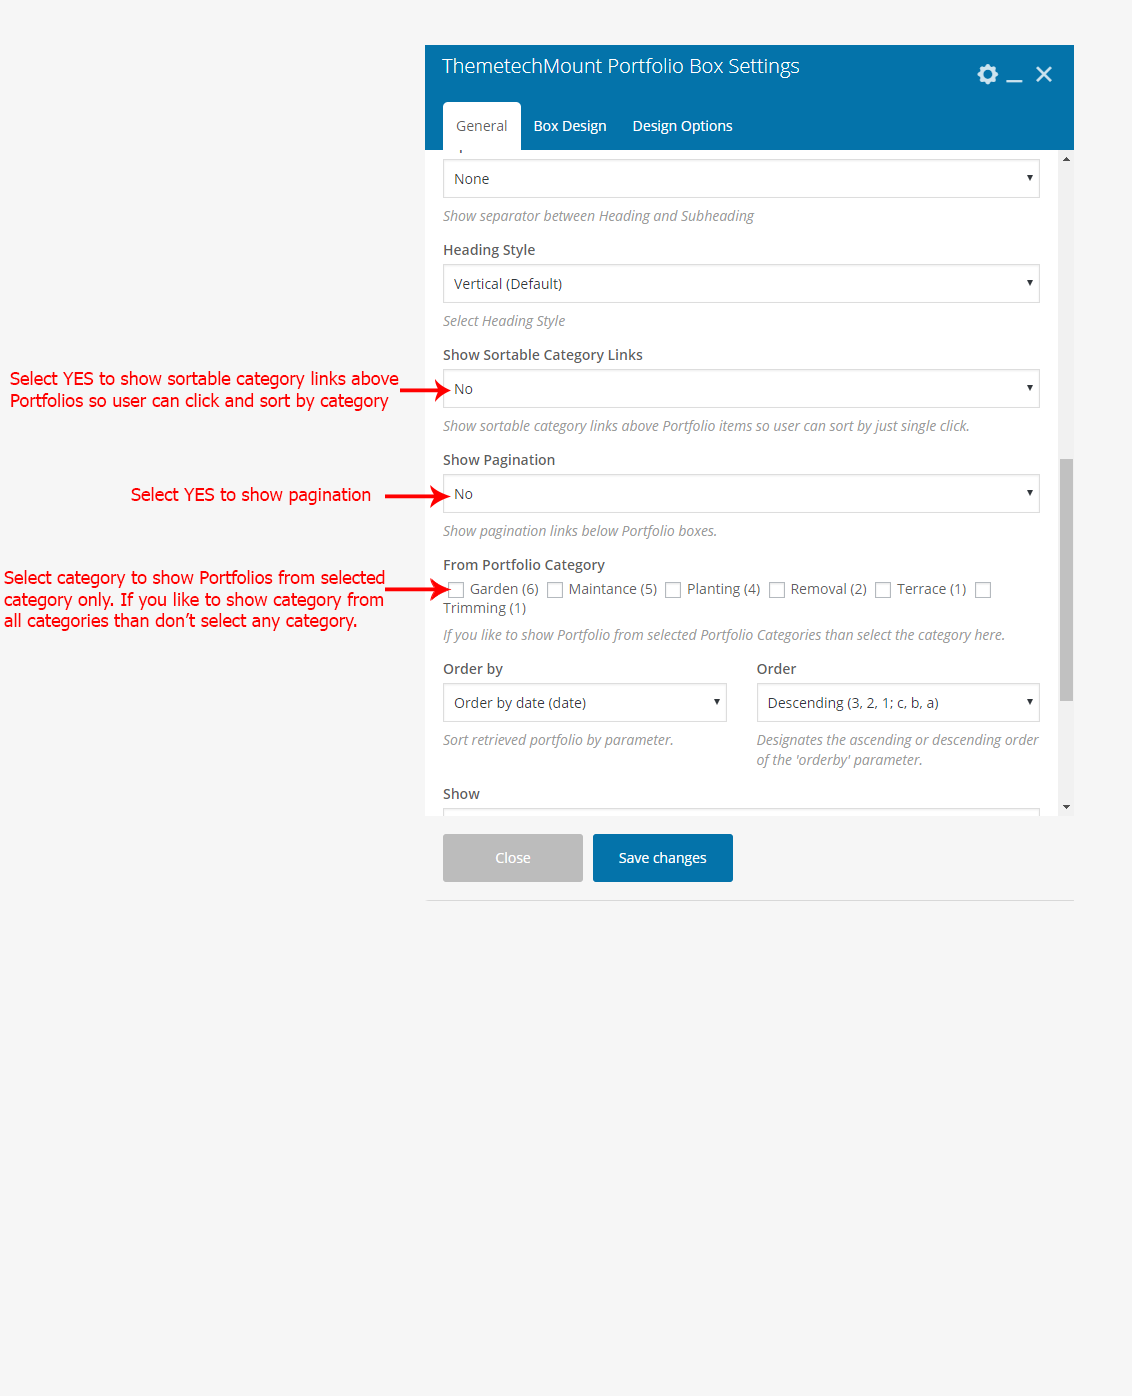
Here is the "Box Design" tab options: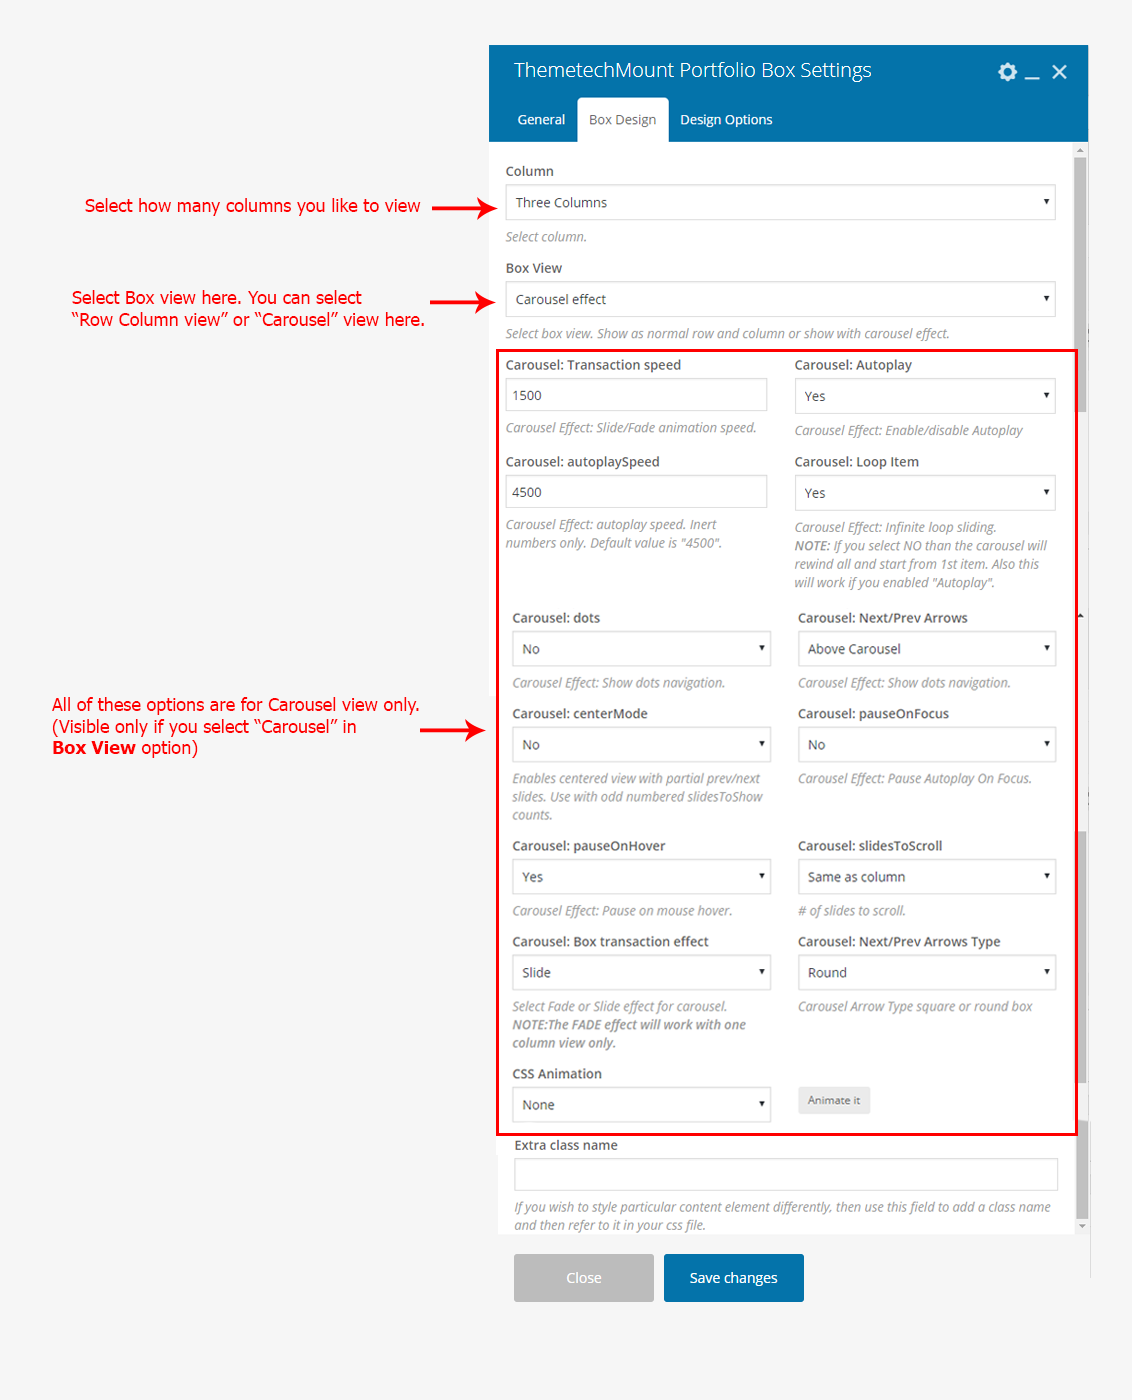
- Save the page by clicking Publish button:
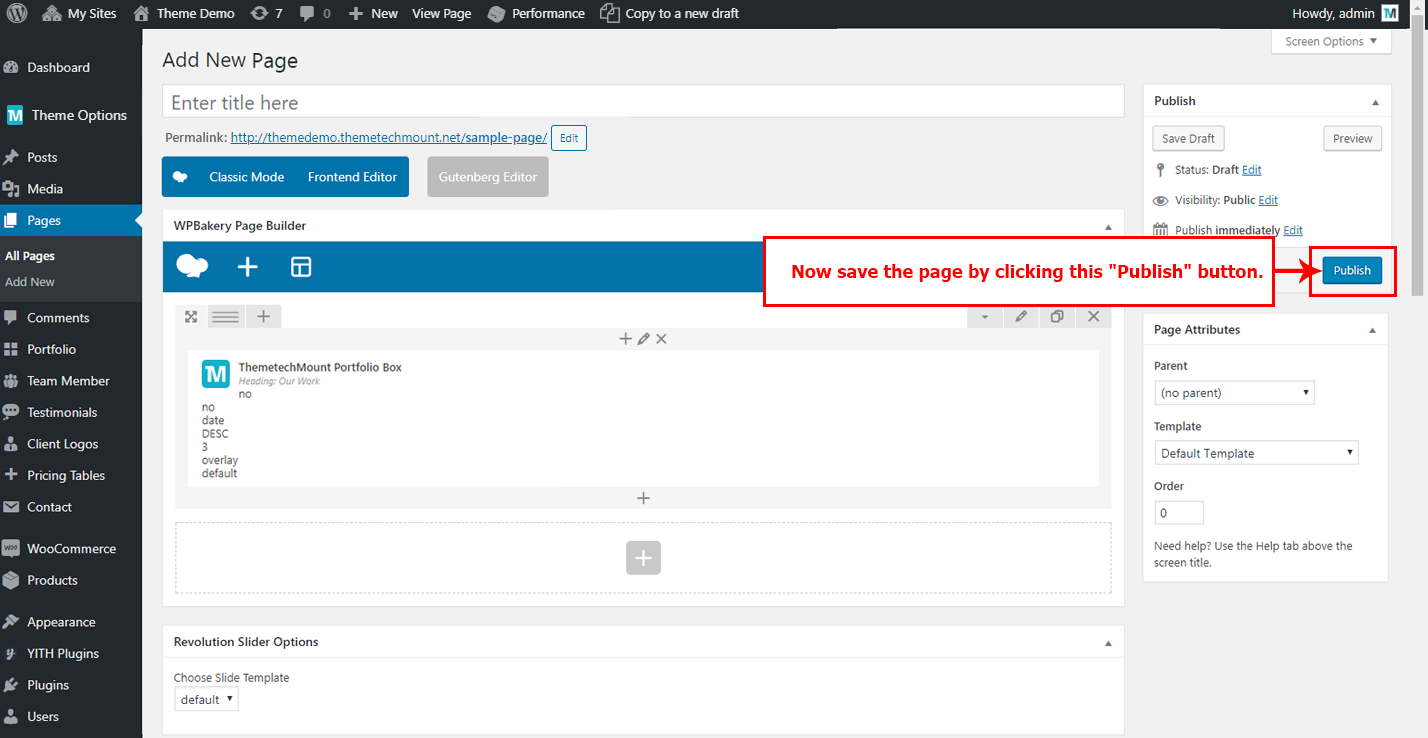
- Now you will see the page is now showing all Portfolios in three column layout. You can change the column view to one, two or four columns too. Just change the Column dropdown and save it to view:

- That's it.
Setting "NO PADDING" view (no space between portfolio boxes)
The current view we set (following the steps given above) is with default spacing between each boxes (left/right/top and bottom spacing). You can reduce the space or remove the spacing between each box.
Change the spacing between boxes:
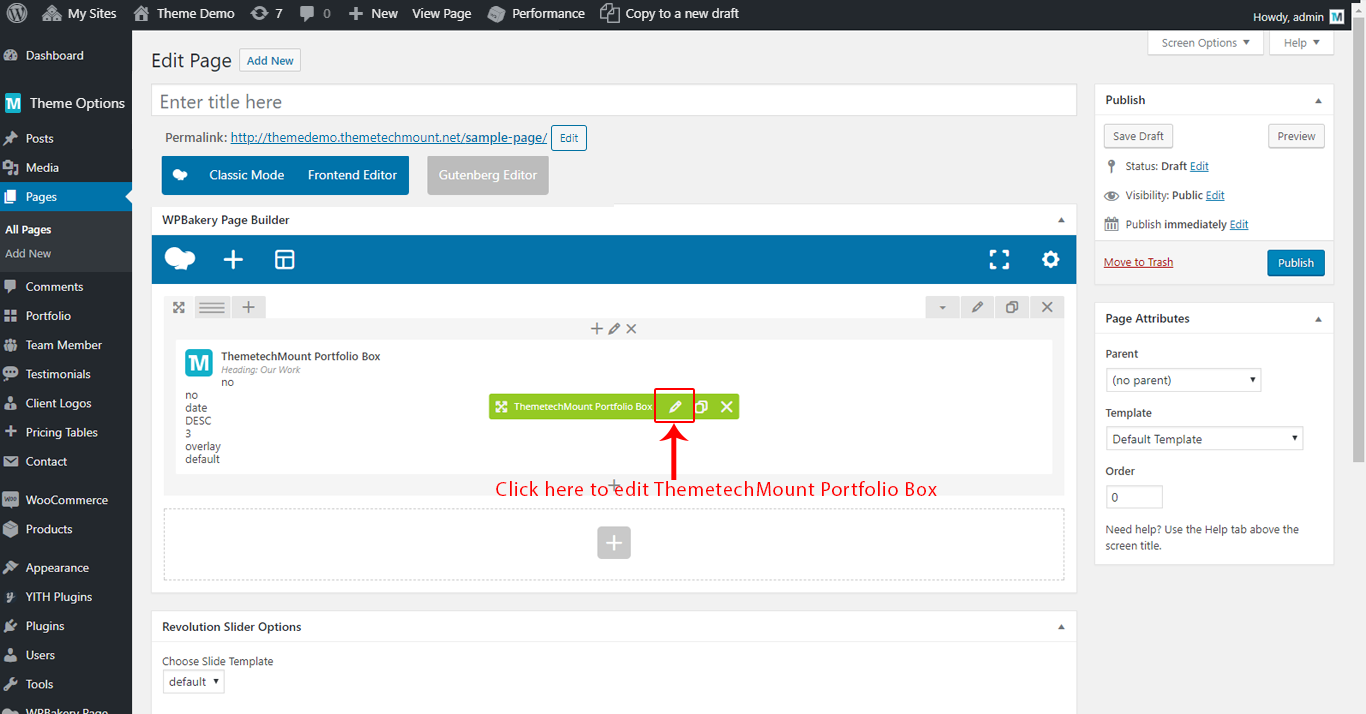
- First. edit the ThemetechMount Portfolio Box as shown in the image below:
- Now change the Box Spacing option and save settings. You will find some options:
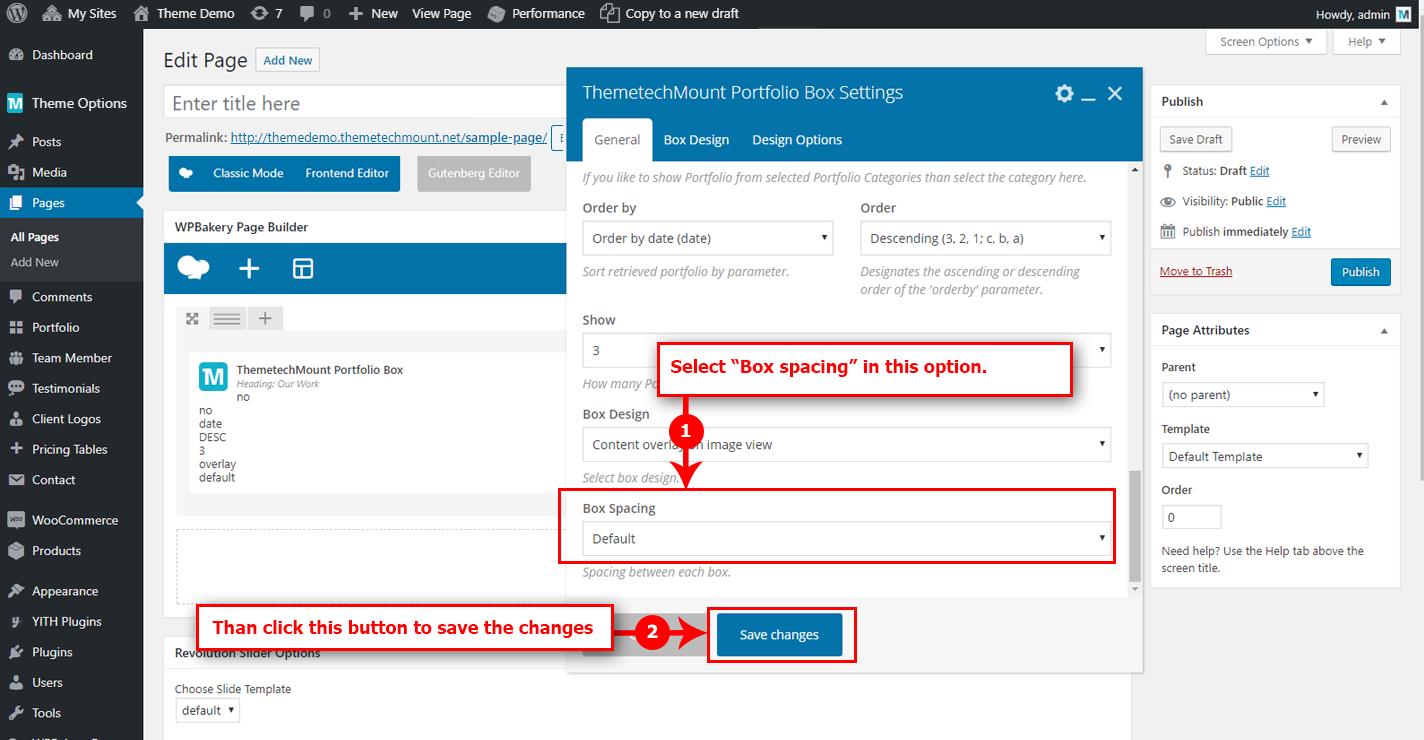
- Now save the page. That's it.
